A Walkthrough Guide to Solving All the Haunted Laia Puzzles
Go on a fantastic voyage of mystery and intrigue with the Haunted Laia walkthrough guide. In this complete guide, we’ll travel into Hidden Town to examine Laia and her family’s mysterious disappearance. With our step-by-step guide, you’ll be able to navigate each level, solve complicated riddles, and find the terrible truth behind the haunting mysteries of Haunted Laia.
Walkthrough to Solving the Puzzles
Explore the House and Gather Clues
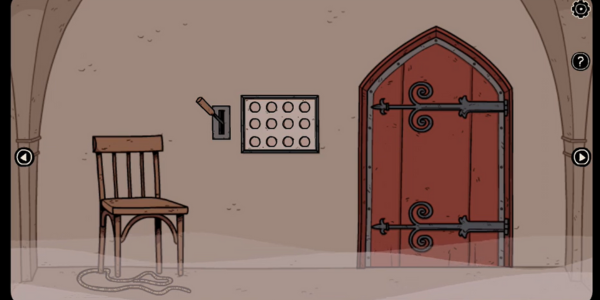
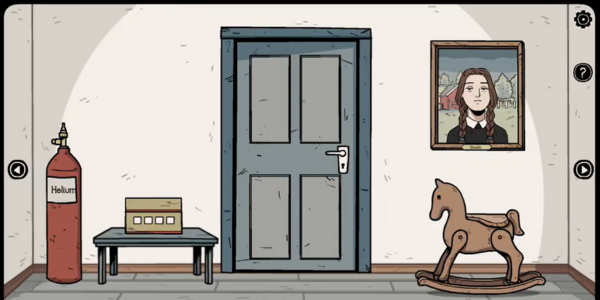
- Upon starting, you’ll find yourself facing a door in a room filled with various objects.
- Collect the rope located near the chair on the floor.
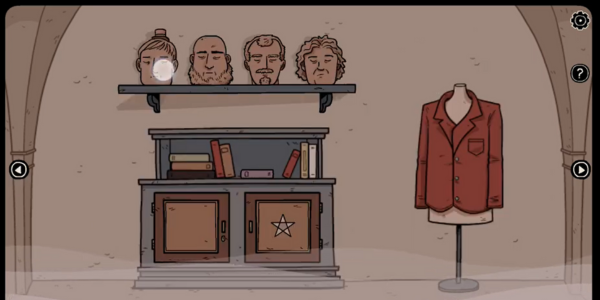
- Turn left to examine a shelf adorned with four peculiar heads.
- Investigate the red jacket on the right to retrieve a paper from its pocket, which will serve as a clue later on.
- Notice a hidden clue on the sleeve of the jacket.
- Discover also the first Iguana collectible in the red jacket sleeve (It’s a bonus quest where you try to find and collect 10 iguanas around the house)
- Examine a purple book atop the blue cabinet to tear out a blank piece of paper.
Cracking the Cabinet Door Puzzle
- Focus on the star-shaped lock on the cabinet door’s right side.
- Refer back to the pictures on the wall to decipher the symbols needed to unlock the cabinet door.
- The arrangement of the symbols may vary whenever you play.
- Adjust the symbols on the lock according to the clues provided by the pictures.
- Open the cabinet to acquire a blue key and a pulley.
- Utilize the blue key to access the bottom drawer beneath the picture of Laia.
Progressing Through the Game
- Retrieve the ‘tint for a typewriter’ (ribbon) from the drawer.
- Add the paper and ribbon to the typewriter to reveal a crucial message.
Solving the Head Puzzle and Unlocking the Purple Box
- Return to the shelf with the four heads and follow the instructions outlined in the typed message.
- Note the number of noises made by each head, as this will provide a four-digit code.
- Collect a small crank from inside a puzzle box located behind the heads.
- Use the obtained four-digit code to unlock the purple box.
- Gather information from the clues inside, including the color order for the skull puzzle.
Mastering the Pulleys
- Attach the Pulley to the designated area and use the crank to raise a box, revealing another puzzle.
- Solve the skull puzzle by aligning the rows according to the color sequence obtained from the clue.
- Use the Cutting Pliers to remove the metal grid covering the hole on the left and initiate a flashback sequence.
Flashback: Cave Entrance
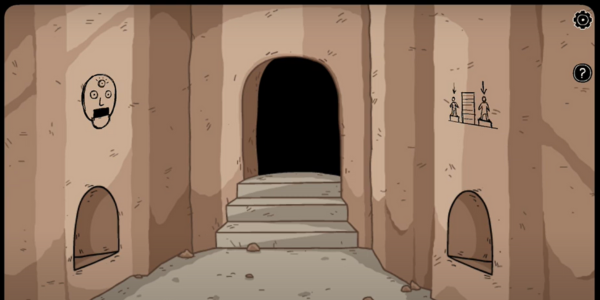
- Upon entering the cave, spot two drawings: a three-eyed face and two figures near a door.
- Check the small hole on the right wall for an iguana collectible (2nd).
- Proceed through the doorway into the first room.
- Examine the top left shelves to find a black book. Retrieve it for valuable clues.
- In the room, note a broken cabinet with a symbol clue. Collect items like a nail and a head of lettuce.
- View a puzzle on the wall and move to an open area with two levels. Look for a broken rope bridge and a smaller rock.
- Check the larger lock on the right for your iguana collection (3rd)
The Lower Level
- On the lower level, explore a large blue cabinet to find a toy boat and a green key.
- Solve a puzzle with locking bars and if it’s correct, it will remain open. Trial and error is needed to find the sequence and solve the puzzle.
- Collect the drill and fluorescent tube.
- Head back up to the main room and examine a panel with four colored switches.
Solving the 4 Colored Lines
- Use the green key to open the panel where you’ll place the fluorescent tube.
- Tap the switches to show the colored lights that will reveal the symbols you’ll use on the squares. Use the black book to get the right sequence of the squares.
- Return to the open area with 2 levels and go back to the lower level. Go to the area with the red door and rock face.
- There’s a box below the rock face; use a code to open it. Collect the large candle, a box, and the clue.
- Go back to the first room and find the puzzle by the wall.
Solving the Button Slider Puzzle
- Move the 4 buttons along the 4 slots.
- Use the paper clue you got and the one on the right wall to solve the puzzle
- You just need to make the buttons resemble what’s on the clue.
- Keep in mind that your clue might differ whenever you play.
- Collect a metal file and black pen after solving.
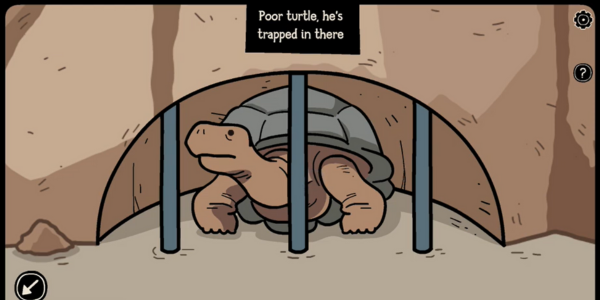
- Go back to the lower level and go to the wall with a turtle that’s behind bars.
How to Free the Turtle and Place the Mirror
- Remove the middle bar with the metal file to collect the iron bar.
- Lure the turtle with lettuce and retrieve a hammer.
- Use the hammer to move the large boulder, revealing a key.
- Use the key to open the large box and collect a spoon, a mirror, and a key.
- Hang the mirror by inserting the nail into the hole and hammering it in.
- Then, attach the black box to the mirror, obtaining a glass eye.
The Third Eye
- In the open area, head to the lower level and locate the rock face.
- Drill a hole at the top of the face and insert the glass eye.
- Obtain scissors and a pink key, observing the eye’s movements.
- Return to the first room, then access the broken cabinet with a vise.
- Adjust the vise, add a large candle, carve a wax key, and collect a lever.
Repairing the Rope Bridge
- Return to the open area and descend to the lower level.
- Examine the chasm with the broken bridge on the right.
- Find an iguana collectible (4th) in the chasm and tap the grey rock for another.
- Proceed to the turtle and open the center door.
- Add the lever to the machine and adjust the 3 dials based on the rock face’s eye direction.
- Activate the lever to repair the bridge and cross it to trigger a cut scene.
Solving the 3-Year-Ago Secret Room
- Experience a flashback to when you first moved into the house, three years ago.
- Encounter a ghost and discover a secret room hidden behind a cupboard. Interact with a rocking horse toy to reveal four symbols, which vary in each game.
- Explore a table and a blanket fort in the room. Read the red book on the table for insights into the cave and a crystal seed.
- Collect an ‘Incomplete Extension Clamp’ from the shelf above the table.
- Search under the white pillow in the blanket fort to find a valve. Tap the blue pillow to collect the iguana (5th).
- Examine the cards on the floor, noting the symbols on their backs. Unlock the yellow box using the noted symbols and retrieve a ball of yarn and a small crank handle.
- Open the drawers on the red desk to find a paper clip. Then add the crank handle to the colorful box to open and collect the black key. Collect the iguana (6th) on the right red curtain by the window.
- Open the red box using the black key to collect the paint thinner and Deflated Balloon. Collect a small rag and screwdriver from the drawer, and then combine the rag and thinner to use on the Giselle painting.
- Use the four symbols revealed to unlock the shutter on the left.
Solving the Dumb Waiter Puzzle
- Activate the dumb waiter hatch by pressing the up button twice to access a clue underneath.
- Note the arrow directions on the paper found below and apply them to set the switches on a box inside the blanket fort.
- Retrieve ‘the end of a gripper’ and a large hook, then attach the hook to the bottom of the dumb waiter.
- Operate the dumb waiter using the buttons to send it down and retrieve the camera. Also, check the note in the purple book on the top shelf for another clue.
Solving the Ghost Photos
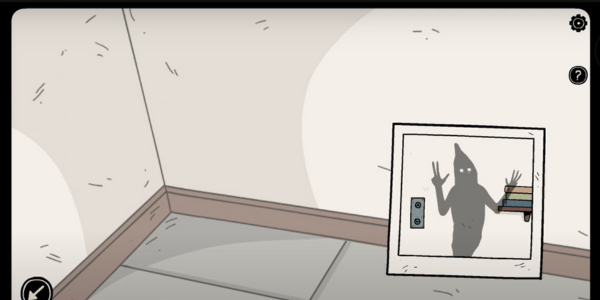
- Use the camera from your inventory to capture room views; take a photo in each perspective.
- Observe the ghostly figures in the photos, noting the number of fingers each holds.
- Refer to the note from the book to determine the sequence based on symbols representing items in the room.
- Open the large chest in the window view using the code derived from the photos.
- Retrieve a bow from the chest and check under the desk for additional items.
Finding the Pencil and the Red Key
- Use the screwdriver to open the pencil sharpener and retrieve a pencil.
- Combine the extension clamp and gripper to reach the pencil inside a hole.
- Sharpen the retrieved pencil using the pencil sharpener on the desk.
- Prepare the helium gas cylinder by adding the valve and inflating a balloon.
- Craft a balloon hook using a paperclip, yarn, and an inflated balloon.
- Look up near the window and tap the arrow to find another iguana collectible (7th).
- Retrieve the red key by attaching a balloon, allowing it to float up and collect the key, and then shooting it down using a bow and a sharpened pencil combination.
- Use the obtained key to unlock the blue door and escape the room.
Solving the Strange Idol Puzzle
- Witness the cutscenes and receive the pink key from your father, who returns with a peculiar idol.
- Employ the strange idol to unlock the red door, leading to an encounter with the witch.
- Fall victim to the witch’s spell, which transports you back to the mysterious house where your memory recovery journey began.
- Utilize pliers to cut open the metal grate and access a cavern beyond.
The Cavern Puzzle
- In the cavern, locate a coffin on the right and retrieve a white stone from the left.
- Open the shutter on the back wall to reveal a Tetris puzzle. Solve it to unlock the coffin.
- Obtain a key and a token with a strange symbol from the opened coffin. Collect another iguana collectible inside the coffin (8th)
- Turn left to return to the house through the archway. Access the shelf of heads and unlock the cabinet below using the key.
- Collect a bottle of cleaning alcohol, a second clue paper, and a photo of a scarecrow.
- Return to the cavern and spot a lamppost. Gather another white stone from the ground and an iguana collectible (9th) from its base.
- Examine a skeleton in a cage and inspect the clues on its hand.
- Explore three pots, finding another iguana collectible (10th) in the left pot and a token in the right.
- Investigate a bird nest on the central column and use the scarecrow photo to make the bird fly away, allowing you to retrieve the nest.
Lighting the Lamp, Weighing the Stones, and Finding the Seeds
- At the lamp post, light a fire using the bird nest, cleaning alcohol and two white stones. Four flies will appear, each settling on a symbol with a specific color.
- Remember the colors and symbols. Head back to the house and unlock the drawer with the matching symbols and colors.
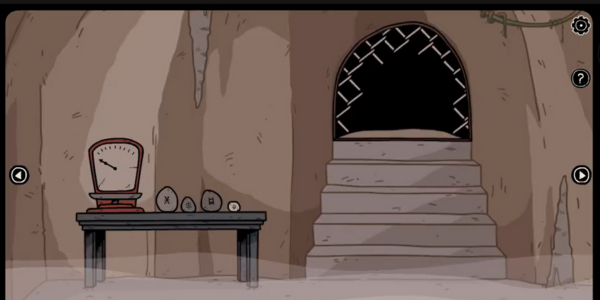
- Inside, collect another token and a piece of clue paper. Then go to the scales with the four stones.
- Weigh four stones on the scale using symbols from the paper.
- Deduce the combination to unlock a metal box nearby. Obtain a third clue paper and a small pickaxe.
- Return to the cavern, use the pickaxe to reveal a clue on the wall, and collect a red diamond.
- Place the red diamond on the skull pedestal in the house to lower a barrier in the cavern. Collect three seeds and another token.
- Return to the house and examine the panel beside the red door. Arrange the tokens according to clues from the papers and the cavern wall.
- Once arranged correctly, pull the lever to open the door and watch the cut.
It’s the end of the main game.
Enjoy Solving Haunted Laia Puzzles
With our detailed walkthrough guide, you’ll embark on an exciting trip through the haunting mysteries of Haunted Laia. From visiting abandoned manors to venturing into treacherous dungeons, each level brings a new obstacle to face and a mystery to solve. So gather your confidence, strengthen your brains, and get ready to answer the riddles ahead. Hidden Town awaits, and only you can unlock its mysteries and solve the mystery of Laia’s disappearance. Happy puzzle-solving!

